If you are still reading me on blogger, I am no longer blogging on this site. You can sign up to follow my new blog and can read my blog at:
http://mrspicklespantry.com/
Thanks for your continued support!
Love,
Mrs. P
Sunday, June 17, 2012
Sunday, April 22, 2012
Food Field Trip: Russo's
Well, we are down to the wire here folks. Exactly one week from now we will no longer be living in our adorable little shoebox. It is really starting to hit home now that there's a pile of boxes that are as high as the ceiling in the corner of our living room. When I am done posting this blog, most of my kitchen gadgets, including my stand mixer, are going to be packed into boxes. I don't envision myself baking any cakes in the next seven days. I will miss all of my adored kitchen items. It will be so wonderful to unpack them all in a few months when we move into our new home in the country! It will be a reunion of sorts.
I am going to miss so many things about our neighborhood, but I am happy that my most favorite food place will still be near and dear to my heart. My office is just over a mile away from this favorite spot of mine, so I will be sure to stop there when I am able to take a lunch break or when I'm on my way home from work. This favorite place of mine? It's Russo's.
A friend and former colleague of mine, Joe, told me about Russo's a few years back. Joe is Italian like me and was blown away by the fact that I had never heard of Russo's. So we traveled there one day after work so Joe could introduce me to Russo's. It was love at first site. I had no idea what I had been missing.
Russo's is a local market specializing in produce. They carry local produce whenever possible and hard to find items as well. You'll see folks from all ethnicities there searching for produce or herbs that are needed to make special cultural dishes. Their prices are reasonable and the quality is second to none. In addition to produce, Russo's carries fresh cut flowers as well as nursery flowers and herbs, fresh natural and organic meat, homemade pasta, a deli with the best Italian meats and Prosciutto di Parma (they have several varieties) outside of Italy, a humungous cheese shop, a bakery, and a prepared foods section. They have a fabulous salad bar that I venture to quite often as well. They also make great sandwiches. Some of my colleagues and I head to Russo's to make salads and get sammies every once in a while. OK, we go there at least once a week when it isn't the busy season. It's just so addictive.
Like many Italians, Christmas Eve is the pinnacle of all holidays for my family. We make sure to head to Russo's to get homemade raviolis and all of the meats and cheeses needed for our anti pasto. No other place will do. My love affair with Russo's runs deep, and I am forever faithful to this place for consistently giving me high quality products at great prices. Every time I decide to do the bulk of my shopping at Russo's and then head to a regular store for just the items I couldn't find at Russo's, my grocery bill tend to be so much less expensive and everything is so much fresher looking.
The only downside to this place is the fact that it is always jammed packed. I arrived there at 8 AM (the time they open) the day before Easter and there was already a line out the door. However I promise you this: the lines and crowds you will deal with are worth it. Just keep calm, you're at Russo's! It's almost like being at Disney World in my opinion. Hey, even my mother and aunt drive an hour to go to Russo's, so that just goes to show you how great this place is!
If you live somewhere near Watertown (where Russo's is located) or are planning a trip to the area, stop by Russo's and see what all the hooplah is for yourself.
http://russos.com/
 |
| Delicatessen Area |
 |
| Prepared Foods/Bakery |
 |
| Fresh breads both baked in store and from local ethnic bakeries around the Boston area |
 |
| Cut Flowers and Florist booth |
 |
| Produce |
 |
| More Produce and fresh meats and dairy area |
 |
| Fresh pasta and ravioli in the front, cheese station in the back |
 |
| Entrance to store interior |
 |
| Exterior, where seasonal nursery items are displayed |
Wednesday, April 11, 2012
Family Dinner: Homestyle Meatloaf (And it's healthy!)
Well, we have just over two weeks left living in the shoebox condo. We've been busy negotiating with realtors and such over the past few weeks. It's been very hectic! I've managed to crank out some delicious dinners and even snapped some photos of the food as well. Loading them into my blog sort of took a backseat, however. Sorry about that, food friends.
The word "meatloaf" always reminds me of my dad. He loves meatloaf. I've never had any strong feelings either way about the dish. Red meat is something I try to steer clear of, and if I do eat it I am usually making a burger or I'm out to eat at a steak house. Traditional meat loaf is one comfort food I have never really been into- until recently.
I created a meatloaf recipe that uses ground chicken breast. Now, I know that ground chicken breast is typically very dry and you are probably skeptical about using it as the main ingredient in a meatloaf recipe. I promise you that this dish is not dry at all thanks to the red bell peppers and sweet onions in the dish which add plenty of mouth watering moisture. In addition, the oatmeal and bread crumbs balance each other out while providing substance. This dish, when compared to a traditional meatloaf, is much lower in fat and has good fiber content thanks to the vegetables and oats. The not so healthy part is the glaze which is tangy sweet and oh so good. I think the glaze is fine to add. It really makes the dish and it still is a delicious and nutritious main course. Meatloaf really reheats well, too. You can probably get a few meals out of this recipe. Who doesn't love leftovers?
Homestyle Meat Loaf
1 lb. ground chicken breast
1/2 c. rolled oats
1/2 c. seasoned bread crumbs
1/2 red bell pepper, finely diced or chopped in food processor
1/2 large onion, finely diced or chopped in food processor
1/4 c. ketchup
1 egg
1/2 tsp. salt
1/2 tsp. ground black pepper
Pre-heat over to 350 degrees Fahrenheit.
Combine ingredients in a large bowl; using hands to incorporate the ingredients. Shape into a loaf and place on a lightly greased cookie sheet. Bake for 40 minutes.
Meanwhile, mix glaze ingredients together. Once meat loaf has baked for 40 minutes, take the loaf out of the oven and pour the glaze evenly over the loaf. Return the loaf to the oven to bake for an additional 15 minutes. Serves four.


The word "meatloaf" always reminds me of my dad. He loves meatloaf. I've never had any strong feelings either way about the dish. Red meat is something I try to steer clear of, and if I do eat it I am usually making a burger or I'm out to eat at a steak house. Traditional meat loaf is one comfort food I have never really been into- until recently.
I created a meatloaf recipe that uses ground chicken breast. Now, I know that ground chicken breast is typically very dry and you are probably skeptical about using it as the main ingredient in a meatloaf recipe. I promise you that this dish is not dry at all thanks to the red bell peppers and sweet onions in the dish which add plenty of mouth watering moisture. In addition, the oatmeal and bread crumbs balance each other out while providing substance. This dish, when compared to a traditional meatloaf, is much lower in fat and has good fiber content thanks to the vegetables and oats. The not so healthy part is the glaze which is tangy sweet and oh so good. I think the glaze is fine to add. It really makes the dish and it still is a delicious and nutritious main course. Meatloaf really reheats well, too. You can probably get a few meals out of this recipe. Who doesn't love leftovers?
Homestyle Meat Loaf
1 lb. ground chicken breast
1/2 c. rolled oats
1/2 c. seasoned bread crumbs
1/2 red bell pepper, finely diced or chopped in food processor
1/2 large onion, finely diced or chopped in food processor
1/4 c. ketchup
1 egg
1/2 tsp. salt
1/2 tsp. ground black pepper
Glaze
1/4 c. ketchup
1 1/2 tbsp. brown sugar
1 tbsp. yellow mustard
Pre-heat over to 350 degrees Fahrenheit.
Combine ingredients in a large bowl; using hands to incorporate the ingredients. Shape into a loaf and place on a lightly greased cookie sheet. Bake for 40 minutes.
Meanwhile, mix glaze ingredients together. Once meat loaf has baked for 40 minutes, take the loaf out of the oven and pour the glaze evenly over the loaf. Return the loaf to the oven to bake for an additional 15 minutes. Serves four.


Monday, March 19, 2012
Soup's On: Chicken Tortilla Soup
Food friends, I must apologize for my month long hiatus. February to March is the busiest time in my profession. Many long nights at the office and weekend work takes place during this time. I barely had time to do laundry and the groceries, so needless to say blogging about food had to take a major back seat. Mr. Pickles and I didn't see each other much during the week and he spent many nights at the local pizza shop and Chipotle down the road. But it's officially spring in my book! My crazy busy work season is over, and I am gearing up for once again walking my dog after work and then coming home and coming home to make delicious meals once again.
Mr. Pickles and I have also been busy trying to sell our shoe box in the city. Guess what? We sold her! She's been a good little condo for five years, but we're ready to move on to bigger and better things. Like my new kitchen with granite counters and stainless steel Bosch appliances. But we won't move into our new digs until June and we close on our condo at the end of April. Which means the Pickles clan is going to be moving back in with my folks for two months. So hopefully we'll have a spotlight series as I work in my mom's kitchen side by side with her. And you'll see some new fancy kitchen shots to boot. Mom's kitchen is oh so much better than my shoebox kitchen.
Like most of the United States, Boston had a mild winter and is having a very early spring. I can't believe all the flowers that are popping up! The magnolia trees are all about to burst open with blooms, too! To you folks in Russia and Europe who are reading this, I wonder what your winter has been like. I am still scratching my head trying to figure out how people found out about Mrs. Pickles Pantry across the globe. I am digging it, however! I feel so international.
It is almost time to put away the soup ladles for the season. But I had to blog about Mr. Pickles #1 favorite soup before doing so. Chicken Tortilla soup is easy to make and packs a powerful punch of tomato, onion, and pepper flavors. If you hate cilantro like Mr. Pickles does, don't omit it. I know that sounds silly, but the cilantro makes the soup and it isn't an offensively strong cilantro flavor. It's a hearty soup for sure thanks to black beans and tortillas. It is low fat if you omit the tortillas, cheese, and other garnishes and is just as tasty without them. Try this out if there is a chill in the air. It reheats well, too. I usually make a big ol' pot and pack some for lunch in the days that follow.
Chicken Tortilla Soup
1/8 c. canola oil
1 medium red pepper, diced
1 medium green pepper, diced
1 large red onion, chopped
2 cloves garlic, minced
2 tsp. dried oregano
1 tsp. cumin
3/4 tsp. chili powder
1 jalapeño pepper, seeded and finely diced
1- 14.5 oz. can petite diced tomatoes with juice
2 chicken thighs with skin on
4 c. chicken stock
1- 15 oz. can black beans, rinsed and drained
2 c. corn kernels (fresh or frozen)
1/2 c. minced fresh cilantro
salt and pepper to taste
blue tortilla chips, fresh avocado slices, shredded monterey jack and sour cream for garnish
In a large stock pot heat canola oil over medium-high heat. Sauté the red and green pepper, onion, garlic, oregano, cumin, and chili powder for 3 minutes, stirring occasionally, until onion is translucent. Add the jalapeño and tomatoes with juice, stir for one minute. Add the chicken thighs and chicken stock.
Bring soup to boil, then immediately reduce heat to simmer. Simmer uncovered for 20 minutes. Remove the chicken thighs, debone the meat off of the bones and skin, cutting into bite size pieces. Add chicken meat back into soup pot. Add the black beans and corn, return soup to boil. Remove soup from heat and add the cilantro, salt, and pepper.
Serve in a rimmed soup bowl with garnishes on the rim. Enjoy!


Tuesday, February 14, 2012
Festive Food- It's Valentine's Day! Pork Medallions with Mustard Cream Sauce
Happy Valentine’s Day, Food Friends! No matter what your relationship status is, I hope you have a great day and remember that you are surrounded by people who love you. I know this is a cliché hallmark holiday, but it’s a day where I make Mr. Pickles some of his favorite things. This includes a dish I used to make to “woo” him. Obviously the proof is in the pudding so to speak. So if you’re trying to seal the deal with a guy or gal you are dating, try making this dish.
Pork Medallions may sound like they are fancy and difficult to make, but they aren’t. A pork medallion is simply a slice of pork tenderloin pounded flat with a meat mallet. This dish sure is rich and fattening and should be made only once in a while. I haven’t made it in a long, long time. Tonight while he was licking his plate clean, Mr. Pickles asked my why we took a hiatus from this dish. I told him the truth- it’s fattening and only made for special occasions now that we’re married. After I sealed the deal with him I figured our waistlines and hearts would benefit from putting this recipe on the shelf for a while.
But try it on your sweetie when you want to have a romantic dinner at home.
Pork Medallions with Mustard Cream Sauce
1 1lb. pork tenderloin
1/3 c. flour
½ tsp. salt
½ tsp. pepper
3 tbsp. butter
4 scallions
1/3 c. dry white wine
1 c. heavy cream
¼ c. Dijon
1 tbsp. honey
Cut the pork tenderloin into ½ inch slices. Place between pieces of plastic wrap and pound to ¼ inch thickness with a meat mallet. Mix the flour, salt, and pepper in a plate. Coat the medallions with the mixture, shaking off any excess.
In a large skillet, sauté the medallions in the butter over medium low heat; 2 minutes per side. Remove to a platter, but reserve the drippings.
Slice the scallions and add to skillet. Sauté until tender. Stir in the wine and cook until the wine is reduced by half (about 3 minutes). Add the cream, mustard, and honey. Add medallions and simmer for 5 minutes.
Spoon sauce over medallions and serve the ones you love.


Tuesday, February 7, 2012
Family Hand-me-downs: Memérè's Onion Filled Meat Pie
Have you ever eaten something and have been immediately transported back to a certain place or time? I take a trip down memory lane each time I eat my Memérè's onion filled meat pie. My Memérè and Pepérè (that's French for grandma and grandpa) used to watch my sister and me during school vacation days and snow days when my folks were off at work. Memérè had the best imagination, and we would always make hand made cards and crafts. She always had the biggest meal of the day at lunch time, and my father worked right down the street from their home. He would come to their house to eat lunch with them just about every day.
Memérè was the definition, the true sense of the word "grandmother." She was kind and caring, always lending an ear and offering her support. She filled twenty nine years of my life with pure, true love. I miss her each and every day and wish she was still here to talk to. When she passed away in 2008, my sister asked if she could take Memérè's hand written cook book. She wasn't much of a cook, but she had a few staple dishes that were very good. This meat pie is one of them. A few weeks ago, Mr. Pickles and I traveled down to see my sister and her husband. I had forgotten about the cook book. My sister pulled it off a shelf in her kitchen, opened it up, and said "Smell the nostalgia." I closed my eyes and inhaled. It smelled just like the adorable cottage home that my grandparents lived in. I thumbed through the pages looking at her cooking instructions, written in her hand writing. It was almost as if I was visiting with her. What a great feeling that was.
This meat pie is so simple and quick to make. It also stores really well and is a fabulous left-over dish. I used very lean hamburg
Memérè's Onion Filled Meat Pie
1 large sweet Onion, thinly sliced
1 lb. ground beef
3/4 c. seasoned bread crumbs
1 egg
1 tbsp. dried parsley
1/4 c. ketchup
1 clove garlic, minced
1/4 tsp. pepper
1/2 tsp. salt
2 tbsp. butter
1/4 c. plus 1 tbsp. grated Parmesan
Preheat oven to 350 degrees Fahrenheit.
Peel and slice onion into 1/4" slices. Separate into rings.
Combine ground beef, bread crumbs, egg, ketchup, parsley, garlic, salt and pepper in a large bowl. Using your hands, mix well until incorporated. Spray a 9" pie plate with cooking spray. Pat the ground beef mixture into the pie plate to form a meat "crust." Bake for 20 minutes.
Meanwhile, saute onion rings in butter over medium heat until limp, not browned. Remove meat from oven and drain off any fat. Sprinkle meat with 1/4c. Parmesan cheese. Spoon onions on top. Sprinkle with remaining 1 tbsp. of Parmesan. Bake for an additional 15 minutes. Serve.


Wednesday, February 1, 2012
Winesday: Firestone Riesling (2009)

I visit a vineyard just about every time I am away on vacation. I have been to Sonoma County, the Virginia region known for wine making between Charlottesville and Floyd, Eastern Long Island's North Fork, Tuscany, and this past fall I went to California's central coast which is in the same region as Santa Barbara. That is why I am writing about Firestone's Riesling.
I was out in California for two weeks on business. I got a bit lonely on the trip but saw some amazingly beautiful parts of the west coast. I ended one Friday in Santa Barbara (which is a place I fell head over heels in love with) and didn't have any work engagements the next day. So, what's a girl to do while she's flying solo in the central coast region? If that girl is Mrs. Pickles the only answer is this: drive to wine country, stop at vineyards, do tastings, purchase wines. There's something about driving down country roads and being surrounded by grape vine covered hills that puts me in the most happy and peaceful states of mind. I researched several vineyards and chose to take a forty minute drive east heading over the canyon into the town of Los Olivos. The ride from Santa Barbara over the canyon was gorgeous in itself, with the Pacific glistening in the sun way off in the distance. It only got better when I entered to adorable town of Los Olivos with its numerous wine shops, restaurants, and local art galleries. I can't wait to return with Mr. Pickles sometime.
I think I like wine so much because of the experience. Seeing the viscosity of the wine, translating that to the percentage of residual sugars in the wine, and then recognizing the top notes of the wine itself. It really is an activity that engages all of your senses. Mr. Pickles and I have made this a huge hobby of ours, and we have wines from every place we have visited.
I must be honest: I headed to Firestone Vineyard only because Andrew Firestone was my favorite on the "The Bachelor." I knew about their fabulous reds, which are widely known and easy to find in stores all over. When I entered the tasting room I must admit that I had never tried a white wine of theirs, and I am not fond of most Rieslings. Rieslings tend to be sweet, unless they are noted as dry on the bottle. Sweet wines are not my forte. I am a fan dry Rieslings, however, which have been introduced onto the wine scene just recently. I almost didn't try this particular wine, but the sommelier serving me insisted that I try it.
The 2009 Firestone Riesling is a semi dry one, and although there are slight sugars they aren't overpowering. This Riesling had a huge honeysuckle nose which translated beautifully on the tongue. It has a slight citrus taste with wonderful melon notes. It was different than other Rieslings I had tried, and I was blown away by the floral components of this wine. And the best part? This bottle is easy to find in many liquor stores. It is also sold for under $14 typically.
Serve this wine with spicy foods like Chinese dishes, sausage, and seafood. It is best served well chilled. 2009 Firestone Riesling earned 89 from Wine Enthusiast. And FYI- don't drink and drive. Mrs. P. was very careful not to taste more than a slight sip of each wine while she was driving around Los Olivos. Be careful out there. Hiring a driver while in wine country is a great idea, too!
Monday, January 30, 2012
Kitchen Gadgets: Staub cookware
Food Friends, my love affair with Staub began a little something like this: I had been noticing that many folks on The Food Network were using cast iron pots. Some of them were even creating their own pots and selling them at retail chains. I wondered if maybe I should get one, too. The cost of these pots was a turn off, as they are rather pricey. So I put it off.
One day I was registering for wedding gifts at Macy's and saw a cobalt blue cast iron pot. It was gorgeous, and made by one of those celeb-chefs who are on tv. I noticed that the price for a 5 quart pot was $109, and when this particular pot was on sale it sold for $49.99. The sale price was at a reasonable price point, and I convinced myself that this pot would be just as good as the pricier brands. So I registered for it.
Last May when I was unwrapping my shower gifts I was delighted to receive the cobalt blue celeb-chef pot. I used it all the time to whip up baked beans, soups, and tomato sauce. It was a great pot, and I was converted into a cook who relied on cast iron. I wanted to order a larger size and went on to Macy's site to do so. That's when I saw it. The recall notice for my cobalt blue pot. It seems that the enamel on the pot was chipping off into people's food, and could also dangerously project off when under heat. The recall said to return the pot for a full refund. So I did, although ever so reluctantly.
I registered at Sur La Table as well, which is a cook's fantasy land. It is my favorite store. After I returned my recalled pot at Macy's, I walked over to Sur La Table and was set to purchase their own name of cast iron pots. And that's when I was introduced to Staub cookware. You see, the people who work at Sur La Table are all chefs themselves, and are very educated on anything to do with food and the kitchen. The woman who helped me told me this wasn't a place to skimp, that cast iron was the main metal used for cooking for years, and the preferred method of French chefs. She also told me that most renowned chefs prefer Staub. And there happened to be two colors that were being discontinued by Staub and were on clearance. The price was a bit more than I originally wanted to spend, but Mr. Pickles gave me the approving look to purchase one. I think he knew how much I would use it and how I hated giving up my cheaper version from Macy's.
Staub cookware is at a comparable price point to Le Creuset (also a great name for cast iron). However, I feel that Staub is slightly superior to Le Creuset. A family company based in the Alsace region of France, Staub is a smaller company that takes the time to hand cast each pot it makes in a sand moulding. In addition, the inside has a dark, pebbled enamel coating, allowing the pot to become very well seasoned after frequent use. This makes the surface non stick without the cancerous chemicals found in non stick pans. The lids of Staub pots are dimpled, which means that when the lid is on, it creates a constant rain bath to continually moisturize and season the food cooking inside.
Cast iron distributes heat more evenly than steel, copper, and non stick surfaces. It is also great for transferring things from the stove top to the oven, and can withstand high temperatures. It is great for slow braising meats like shorts ribs and roast chicken and also comes in handy when you are making hearty soups and stews. I use my Staub La Cocotte at least once a week. You've seen it in other blog postings already and will continue to see my Staub pots in future posts as well. Yes, I said pots. I was so in love with my 5.5 quart Staub pot that I asked for the 2.5 and 9 quart sizes for Christmas. All in the same color. And I got the magnetic trivet to go with it! It's a great set and the discontinued color is an ocean blue. And I saved a little money purchasing this color, which is fine by me! This is by far the most used piece of cookware in our home. It was well worth the money!


Monday, January 23, 2012
Sweet Endings: Happy Pie Day! Chocolate Amaretto Cream Pie
January 23 is National Pie Day here in the United States! I learned this at 8:30 this morning thanks to my email news ticker. My original blog was going to be about one of my favorite kitchen gadgets, but I changed some things around once I learned what today was. Pies might just be my favorite desserts to make. I don't typically bake them in the winter; I prefer to make fresh fruit pies with native fruits when in season. So this summer you will be seeing many varying pie recipes. I can't wait for the berries to come out!
But today I whipped up a delicious chocolate amaretto cream pie. It is a quick pie to make and is a good one when seasonal fruit isn't an option. I chose to make the whipped cream amaretto flavored. We enjoy the liquer after dinner, especially when it is cold outside. And, the almond flavor goes perfectly with chocolate. I made a very quick crust using my food processor. This isn't the way I prefer to make a homemade crust. I usually take the time to mix it by hand with a manual pastry blender. This also isn't my favorite crust recipe, but it is quick and was fine for this pie. Make sure that your egg yolks and milk are at room temperature.
OK, folks, this blog entry is going to be short and sweet. It's pretty late and I have just finished the pie. It's time to go to bed and dream about all things pie! Have a sweet night, Food Friends!
Chocolate Amaretto Cream Pie
Crust:
1 c. all-purpose flour
1/2 tsp. salt
1/3 c. plus 1 tbsp. shortening
2-3 tbsp. ice cold water
Put flour and salt into processor. Pulse to mix together. Add shortening. Mix until pea size crumbs form. Add water, 1 tablespoon at a time until dough begins to from. Remove from processor. lay on pastry board or floured flat surface, roll with rolling pin. Fit into a 9 inch glass pie dish. bake at 375 Fahrenheit for 8-10 minutes.
Chocolate Filling:
5 1/2 oz. pieces of unsweetened baking chocolate
3 cups milk, divided
1 1/3 c. sugar
3 tbsp. all purpose flour
3 tbsp. corn starch
1.2 tsp. salt
3 egg yolks
2 tbsp. butter
1 1/2 tsp. vanilla
Combine chocolate and 2 cups milk in a medium sauce pan; cook over medium heat, stirring constantly, just until mixture boils. Remove from heat and set aside.
Stir together sugar, flour, cornstarch, and salt in medium bowl. Whisk remaining 1 cup milk into egg yolks in separate medium bowl; stir into sugar mixture. Gradually add to chocolate mixture. Cook over medium heat, whisking constantly until mixture boils. Boil lightly while stirring constantly for one minute until thickened. Remove from heat, add butter and vanilla. Stir well to incorporate.
Pour into prepared pie crust; press plastic wrap directly onto chocolate surface. Refrigerate until well chilled.
Amaretto Whipped Cream:
1 pint heavy cream
1/4 c. powdered sugar
1/2 tsp. vanilla
1 1/2 tbsp. amaretto liquer
With a hand mixer on high speed, blend all ingredients together until thickened into a whipped cream. Be careful not to overwhip or you will have butter! Spread or pipe generously onto chocolate surface of pie. Garnish with chocolate shavings.


Saturday, January 21, 2012
Is There An App For That: Baked Eggplant Rollatini
Food friends, I know I have blogged mostly about my wonderful husband, but this blog is dedicated to a subject that another important love in my life knows so much about: my mama. She is the queen of eggplant parmigiana. I went to college about two and a half hours away from my hometown, which meant I came home rarely; mostly just for breaks. I talk to my mom every day and have been doing so since I left for college. When my mom knew I would be coming home for a school break, she'd always ask if I wanted her to make any particular foods. My answer was always the same: eggplant parmigiana. You see, my mother's side is Italian. My grandmother, Aldina, was one of five children. Her mother, Assunta, came to the United States from southern Italy when she was 16. Assunta made the best eggplant. And before she passed away she taught my mother how to make it the same way. When we get together with my grandmother, her siblings, and all of their children and grandchildren, my mom is on eggplant duty. Those huge family gatherings don't happen that often any more, but when they do happen everyone agrees that mom's eggplant is the best, just like Assunta's.
Eggplant is my ultimate comfort food. I just love the flavor of it. This past summer Mr. Pickles and I honeymooned in Italy. Eggplant was a staple of most dishes I ate while in the seaside town of Positano. My goodness, the eggplant was to die for! I had a baked eggplant for lunch one day at a hotel on Positano's beach. It had local olives, tomatoes, and Pecorino Romano cheese on it with a drizzle of olive oil. It was so simple (like many foods in Italy) but the freshness of the ingredients made this dish stay on my mind ever since. The last night of our honeymoon I had eggplant tortellini. I wanted to lick my plate clean. Then there was the grilled eggplant I had in a pasta dish in Florence. Delicious. Can you tell it is my favorite food? If I had to choose one food to eat for the rest of my life, mom's eggplant parmigiana would be it.
So, eggplant is always present at the holidays and when we have a family dinner. My husband had eggplant rollatini for the first time a few months ago when we went out to dinner and ordered it as an appetizer. Last week he said "You need to learn how to make that eggplant appetizer we had." I shot him a look of disappointment and said "I know how to make that dish." So, I got the ingredients needed for eggplant rollatini and went to work. I chose to bake the eggplant verses frying it and used part skim mozzarella and ricotta to try and make this a little less fattening. And I feel breadcrumbs overpower eggplant's light flavor, so I opted for a flour breading with a bit of polenta meal mixed in for texture and crunch. Also, I make my own tomato sauce about once a month and freeze it into equal portions to use for quick dinners during the week. Making homemade sauce is so simple and the taste is great. If you aren't comfortable making your own sauce, I think Newman's Own organic tomato basil sauce is a good option.
This dish is so pretty on a plain plate with the eggplant's purple edges rolled up and the cheese peeking out of the middle. Don't use too much sauce, just add a heaping tablespoonful onto each roll before baking. It's easy to serve up on small plates to a large crowd, or, if you want, it can be a main course for dinner as well! And keep a small bowl filled with sauce accompanying the rollatinis so people can spoon more sauce on if they choose to.
Ah, now I want to go back to Italy. It was gorgeous and a food lover's paradise to boot.
Baked Eggplant Rollatini
1 large eggplant, it should be firm with a slight give when lightly pressed
2 eggs, slightly beaten with 1 tbsp. water
1/2 c. all purpose flour
1/3 c. polenta meal
1/2 tsp. ground black pepper
1/4 tsp. salt
2-4 tbsp. extra virgin olive oil (enough to lightly coat baking sheets)
olive oil cooking spray or mister
for filling:
15 oz. part skim ricotta
1/3 c. shredded mozzarella plus more for topping
1 large clove garlic, pressed
1 tsp. dried basil
1/2 tsp. dried oregano
fresh ground pepper, 3 turns of the pepper mill
1/4 tsp. sea salt
Preheat oven to 425 degrees Fahrenheit.
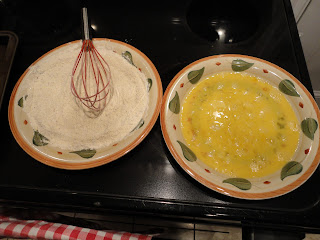
Slice eggplant the long way using a mandoline or knife into thing pieces, about 1/4 inch thick. Pour the egg wash into one dinner plate. In the other dinner plate, combine flour, polenta meal, ground pepper, and salt with a whisk or spoon until well mixed. Take out two cookie sheets. Pour 1-2 tbsp. olive oil onto each sheet, using a basting brush to spread evenly. Dredge the eggplant slices into the egg wash first, then the flour mixture. Place the dredged slices onto the cookie sheets. Take your olive oil cooking spray or mister and lightly and evenly coat the eggplant that is face up with oil. Place in the oven for 15-25 minutes, or until eggplant is golden brown (make sure to keep your eye on it so it doesn't burn). Remove from oven and turn the oven temperature down to 375 degrees Fahrenheit.


Eggplant is my ultimate comfort food. I just love the flavor of it. This past summer Mr. Pickles and I honeymooned in Italy. Eggplant was a staple of most dishes I ate while in the seaside town of Positano. My goodness, the eggplant was to die for! I had a baked eggplant for lunch one day at a hotel on Positano's beach. It had local olives, tomatoes, and Pecorino Romano cheese on it with a drizzle of olive oil. It was so simple (like many foods in Italy) but the freshness of the ingredients made this dish stay on my mind ever since. The last night of our honeymoon I had eggplant tortellini. I wanted to lick my plate clean. Then there was the grilled eggplant I had in a pasta dish in Florence. Delicious. Can you tell it is my favorite food? If I had to choose one food to eat for the rest of my life, mom's eggplant parmigiana would be it.
So, eggplant is always present at the holidays and when we have a family dinner. My husband had eggplant rollatini for the first time a few months ago when we went out to dinner and ordered it as an appetizer. Last week he said "You need to learn how to make that eggplant appetizer we had." I shot him a look of disappointment and said "I know how to make that dish." So, I got the ingredients needed for eggplant rollatini and went to work. I chose to bake the eggplant verses frying it and used part skim mozzarella and ricotta to try and make this a little less fattening. And I feel breadcrumbs overpower eggplant's light flavor, so I opted for a flour breading with a bit of polenta meal mixed in for texture and crunch. Also, I make my own tomato sauce about once a month and freeze it into equal portions to use for quick dinners during the week. Making homemade sauce is so simple and the taste is great. If you aren't comfortable making your own sauce, I think Newman's Own organic tomato basil sauce is a good option.
This dish is so pretty on a plain plate with the eggplant's purple edges rolled up and the cheese peeking out of the middle. Don't use too much sauce, just add a heaping tablespoonful onto each roll before baking. It's easy to serve up on small plates to a large crowd, or, if you want, it can be a main course for dinner as well! And keep a small bowl filled with sauce accompanying the rollatinis so people can spoon more sauce on if they choose to.
Ah, now I want to go back to Italy. It was gorgeous and a food lover's paradise to boot.
Baked Eggplant Rollatini
1 large eggplant, it should be firm with a slight give when lightly pressed
2 eggs, slightly beaten with 1 tbsp. water
1/2 c. all purpose flour
1/3 c. polenta meal
1/2 tsp. ground black pepper
1/4 tsp. salt
2-4 tbsp. extra virgin olive oil (enough to lightly coat baking sheets)
olive oil cooking spray or mister
for filling:
15 oz. part skim ricotta
1/3 c. shredded mozzarella plus more for topping
1 large clove garlic, pressed
1 tsp. dried basil
1/2 tsp. dried oregano
fresh ground pepper, 3 turns of the pepper mill
1/4 tsp. sea salt
Preheat oven to 425 degrees Fahrenheit.
Slice eggplant the long way using a mandoline or knife into thing pieces, about 1/4 inch thick. Pour the egg wash into one dinner plate. In the other dinner plate, combine flour, polenta meal, ground pepper, and salt with a whisk or spoon until well mixed. Take out two cookie sheets. Pour 1-2 tbsp. olive oil onto each sheet, using a basting brush to spread evenly. Dredge the eggplant slices into the egg wash first, then the flour mixture. Place the dredged slices onto the cookie sheets. Take your olive oil cooking spray or mister and lightly and evenly coat the eggplant that is face up with oil. Place in the oven for 15-25 minutes, or until eggplant is golden brown (make sure to keep your eye on it so it doesn't burn). Remove from oven and turn the oven temperature down to 375 degrees Fahrenheit.


Subscribe to:
Comments (Atom)