Food Friends, my love affair with Staub began a little something like this: I had been noticing that many folks on The Food Network were using cast iron pots. Some of them were even creating their own pots and selling them at retail chains. I wondered if maybe I should get one, too. The cost of these pots was a turn off, as they are rather pricey. So I put it off.
One day I was registering for wedding gifts at Macy's and saw a cobalt blue cast iron pot. It was gorgeous, and made by one of those celeb-chefs who are on tv. I noticed that the price for a 5 quart pot was $109, and when this particular pot was on sale it sold for $49.99. The sale price was at a reasonable price point, and I convinced myself that this pot would be just as good as the pricier brands. So I registered for it.
Last May when I was unwrapping my shower gifts I was delighted to receive the cobalt blue celeb-chef pot. I used it all the time to whip up baked beans, soups, and tomato sauce. It was a great pot, and I was converted into a cook who relied on cast iron. I wanted to order a larger size and went on to Macy's site to do so. That's when I saw it. The recall notice for my cobalt blue pot. It seems that the enamel on the pot was chipping off into people's food, and could also dangerously project off when under heat. The recall said to return the pot for a full refund. So I did, although ever so reluctantly.
I registered at Sur La Table as well, which is a cook's fantasy land. It is my favorite store. After I returned my recalled pot at Macy's, I walked over to Sur La Table and was set to purchase their own name of cast iron pots. And that's when I was introduced to Staub cookware. You see, the people who work at Sur La Table are all chefs themselves, and are very educated on anything to do with food and the kitchen. The woman who helped me told me this wasn't a place to skimp, that cast iron was the main metal used for cooking for years, and the preferred method of French chefs. She also told me that most renowned chefs prefer Staub. And there happened to be two colors that were being discontinued by Staub and were on clearance. The price was a bit more than I originally wanted to spend, but Mr. Pickles gave me the approving look to purchase one. I think he knew how much I would use it and how I hated giving up my cheaper version from Macy's.
Staub cookware is at a comparable price point to Le Creuset (also a great name for cast iron). However, I feel that Staub is slightly superior to Le Creuset. A family company based in the Alsace region of France, Staub is a smaller company that takes the time to hand cast each pot it makes in a sand moulding. In addition, the inside has a dark, pebbled enamel coating, allowing the pot to become very well seasoned after frequent use. This makes the surface non stick without the cancerous chemicals found in non stick pans. The lids of Staub pots are dimpled, which means that when the lid is on, it creates a constant rain bath to continually moisturize and season the food cooking inside.
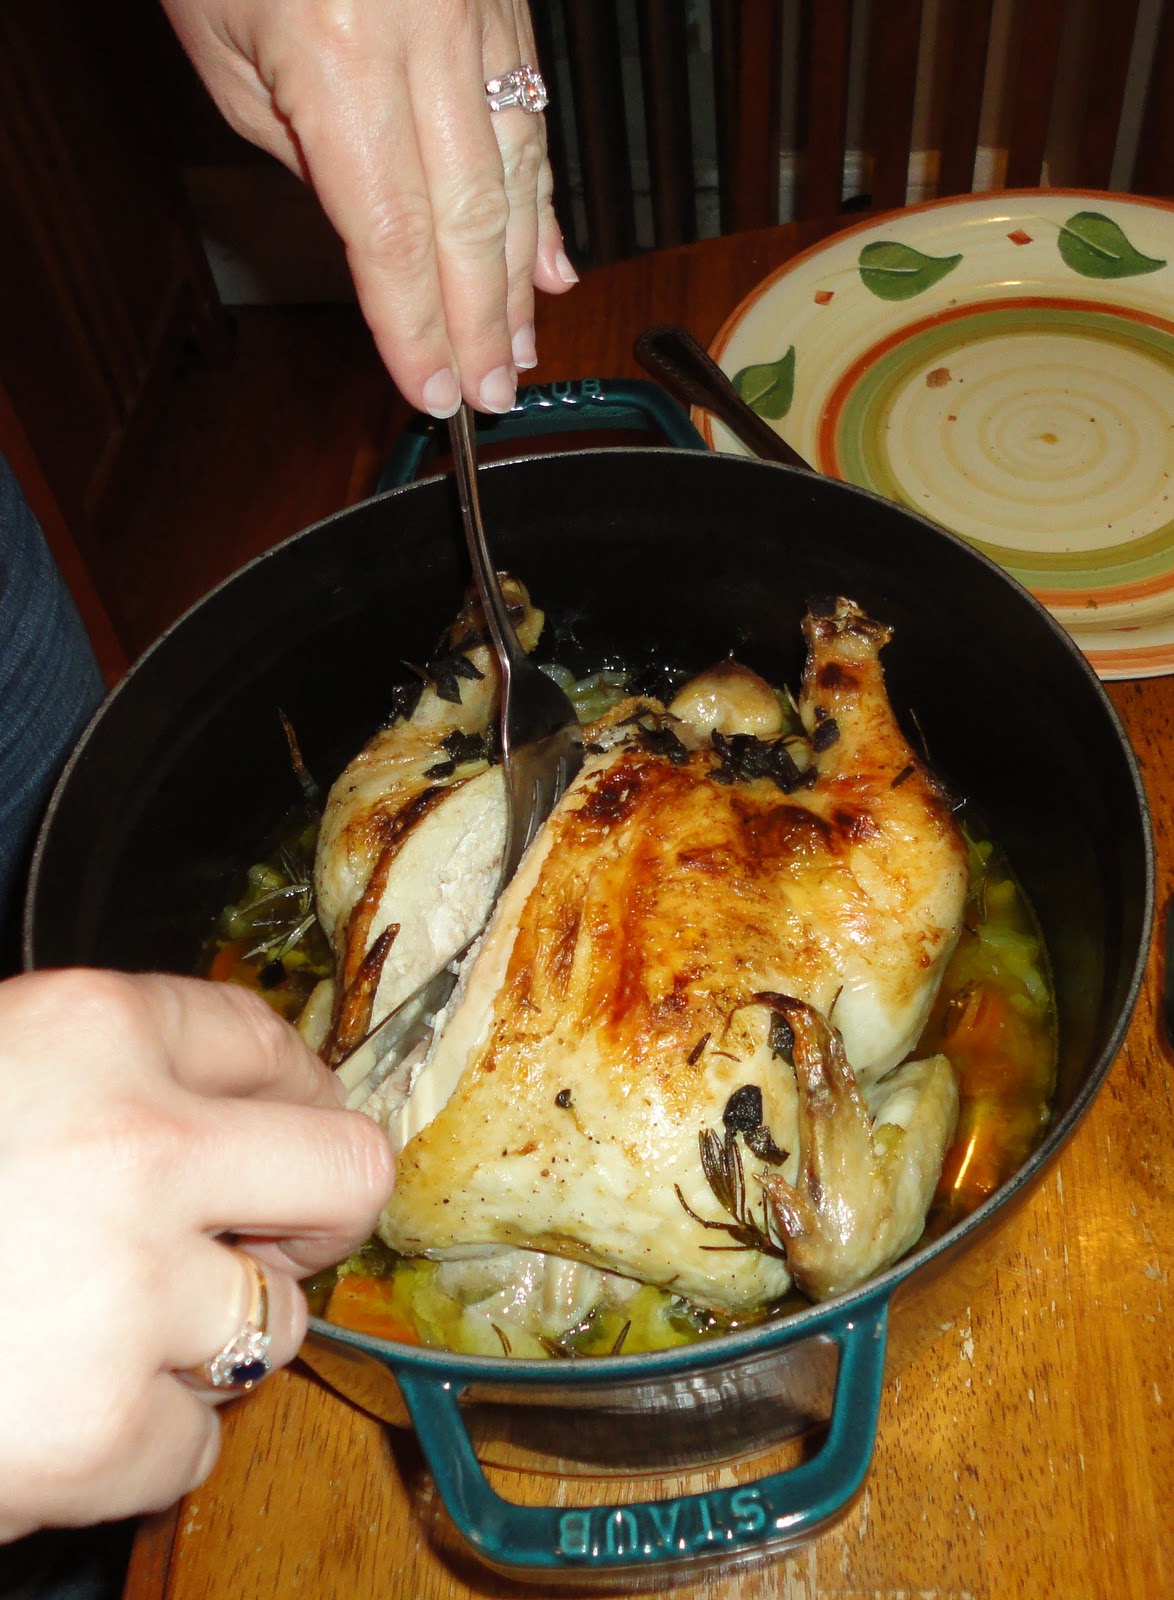
Cast iron distributes heat more evenly than steel, copper, and non stick surfaces. It is also great for transferring things from the stove top to the oven, and can withstand high temperatures. It is great for slow braising meats like shorts ribs and roast chicken and also comes in handy when you are making hearty soups and stews. I use my Staub La Cocotte at least once a week. You've seen it in other blog postings already and will continue to see my Staub pots in future posts as well. Yes, I said pots. I was so in love with my 5.5 quart Staub pot that I asked for the 2.5 and 9 quart sizes for Christmas. All in the same color. And I got the magnetic trivet to go with it! It's a great set and the discontinued color is an ocean blue. And I saved a little money purchasing this color, which is fine by me! This is by far the most used piece of cookware in our home. It was well worth the money!
Monday, January 30, 2012
Monday, January 23, 2012
Sweet Endings: Happy Pie Day! Chocolate Amaretto Cream Pie
January 23 is National Pie Day here in the United States! I learned this at 8:30 this morning thanks to my email news ticker. My original blog was going to be about one of my favorite kitchen gadgets, but I changed some things around once I learned what today was. Pies might just be my favorite desserts to make. I don't typically bake them in the winter; I prefer to make fresh fruit pies with native fruits when in season. So this summer you will be seeing many varying pie recipes. I can't wait for the berries to come out!
But today I whipped up a delicious chocolate amaretto cream pie. It is a quick pie to make and is a good one when seasonal fruit isn't an option. I chose to make the whipped cream amaretto flavored. We enjoy the liquer after dinner, especially when it is cold outside. And, the almond flavor goes perfectly with chocolate. I made a very quick crust using my food processor. This isn't the way I prefer to make a homemade crust. I usually take the time to mix it by hand with a manual pastry blender. This also isn't my favorite crust recipe, but it is quick and was fine for this pie. Make sure that your egg yolks and milk are at room temperature.
OK, folks, this blog entry is going to be short and sweet. It's pretty late and I have just finished the pie. It's time to go to bed and dream about all things pie! Have a sweet night, Food Friends!
Chocolate Amaretto Cream Pie
Crust:
1 c. all-purpose flour
1/2 tsp. salt
1/3 c. plus 1 tbsp. shortening
2-3 tbsp. ice cold water
Put flour and salt into processor. Pulse to mix together. Add shortening. Mix until pea size crumbs form. Add water, 1 tablespoon at a time until dough begins to from. Remove from processor. lay on pastry board or floured flat surface, roll with rolling pin. Fit into a 9 inch glass pie dish. bake at 375 Fahrenheit for 8-10 minutes.
Chocolate Filling:
5 1/2 oz. pieces of unsweetened baking chocolate
3 cups milk, divided
1 1/3 c. sugar
3 tbsp. all purpose flour
3 tbsp. corn starch
1.2 tsp. salt
3 egg yolks
2 tbsp. butter
1 1/2 tsp. vanilla
Combine chocolate and 2 cups milk in a medium sauce pan; cook over medium heat, stirring constantly, just until mixture boils. Remove from heat and set aside.
Stir together sugar, flour, cornstarch, and salt in medium bowl. Whisk remaining 1 cup milk into egg yolks in separate medium bowl; stir into sugar mixture. Gradually add to chocolate mixture. Cook over medium heat, whisking constantly until mixture boils. Boil lightly while stirring constantly for one minute until thickened. Remove from heat, add butter and vanilla. Stir well to incorporate.
Pour into prepared pie crust; press plastic wrap directly onto chocolate surface. Refrigerate until well chilled.
Amaretto Whipped Cream:
1 pint heavy cream
1/4 c. powdered sugar
1/2 tsp. vanilla
1 1/2 tbsp. amaretto liquer
With a hand mixer on high speed, blend all ingredients together until thickened into a whipped cream. Be careful not to overwhip or you will have butter! Spread or pipe generously onto chocolate surface of pie. Garnish with chocolate shavings.
Saturday, January 21, 2012
Is There An App For That: Baked Eggplant Rollatini
Food friends, I know I have blogged mostly about my wonderful husband, but this blog is dedicated to a subject that another important love in my life knows so much about: my mama. She is the queen of eggplant parmigiana. I went to college about two and a half hours away from my hometown, which meant I came home rarely; mostly just for breaks. I talk to my mom every day and have been doing so since I left for college. When my mom knew I would be coming home for a school break, she'd always ask if I wanted her to make any particular foods. My answer was always the same: eggplant parmigiana. You see, my mother's side is Italian. My grandmother, Aldina, was one of five children. Her mother, Assunta, came to the United States from southern Italy when she was 16. Assunta made the best eggplant. And before she passed away she taught my mother how to make it the same way. When we get together with my grandmother, her siblings, and all of their children and grandchildren, my mom is on eggplant duty. Those huge family gatherings don't happen that often any more, but when they do happen everyone agrees that mom's eggplant is the best, just like Assunta's.
Eggplant is my ultimate comfort food. I just love the flavor of it. This past summer Mr. Pickles and I honeymooned in Italy. Eggplant was a staple of most dishes I ate while in the seaside town of Positano. My goodness, the eggplant was to die for! I had a baked eggplant for lunch one day at a hotel on Positano's beach. It had local olives, tomatoes, and Pecorino Romano cheese on it with a drizzle of olive oil. It was so simple (like many foods in Italy) but the freshness of the ingredients made this dish stay on my mind ever since. The last night of our honeymoon I had eggplant tortellini. I wanted to lick my plate clean. Then there was the grilled eggplant I had in a pasta dish in Florence. Delicious. Can you tell it is my favorite food? If I had to choose one food to eat for the rest of my life, mom's eggplant parmigiana would be it.
So, eggplant is always present at the holidays and when we have a family dinner. My husband had eggplant rollatini for the first time a few months ago when we went out to dinner and ordered it as an appetizer. Last week he said "You need to learn how to make that eggplant appetizer we had." I shot him a look of disappointment and said "I know how to make that dish." So, I got the ingredients needed for eggplant rollatini and went to work. I chose to bake the eggplant verses frying it and used part skim mozzarella and ricotta to try and make this a little less fattening. And I feel breadcrumbs overpower eggplant's light flavor, so I opted for a flour breading with a bit of polenta meal mixed in for texture and crunch. Also, I make my own tomato sauce about once a month and freeze it into equal portions to use for quick dinners during the week. Making homemade sauce is so simple and the taste is great. If you aren't comfortable making your own sauce, I think Newman's Own organic tomato basil sauce is a good option.
This dish is so pretty on a plain plate with the eggplant's purple edges rolled up and the cheese peeking out of the middle. Don't use too much sauce, just add a heaping tablespoonful onto each roll before baking. It's easy to serve up on small plates to a large crowd, or, if you want, it can be a main course for dinner as well! And keep a small bowl filled with sauce accompanying the rollatinis so people can spoon more sauce on if they choose to.
Ah, now I want to go back to Italy. It was gorgeous and a food lover's paradise to boot.
Baked Eggplant Rollatini
1 large eggplant, it should be firm with a slight give when lightly pressed
2 eggs, slightly beaten with 1 tbsp. water
1/2 c. all purpose flour
1/3 c. polenta meal
1/2 tsp. ground black pepper
1/4 tsp. salt
2-4 tbsp. extra virgin olive oil (enough to lightly coat baking sheets)
olive oil cooking spray or mister
for filling:
15 oz. part skim ricotta
1/3 c. shredded mozzarella plus more for topping
1 large clove garlic, pressed
1 tsp. dried basil
1/2 tsp. dried oregano
fresh ground pepper, 3 turns of the pepper mill
1/4 tsp. sea salt
Preheat oven to 425 degrees Fahrenheit.
Slice eggplant the long way using a mandoline or knife into thing pieces, about 1/4 inch thick. Pour the egg wash into one dinner plate. In the other dinner plate, combine flour, polenta meal, ground pepper, and salt with a whisk or spoon until well mixed. Take out two cookie sheets. Pour 1-2 tbsp. olive oil onto each sheet, using a basting brush to spread evenly. Dredge the eggplant slices into the egg wash first, then the flour mixture. Place the dredged slices onto the cookie sheets. Take your olive oil cooking spray or mister and lightly and evenly coat the eggplant that is face up with oil. Place in the oven for 15-25 minutes, or until eggplant is golden brown (make sure to keep your eye on it so it doesn't burn). Remove from oven and turn the oven temperature down to 375 degrees Fahrenheit.
Monday, January 16, 2012
Sinful Sides: Sauteed Brussels Sprouts and Garlic
Oh how I love super foods! Brussels sprouts are a member of the cruciferous vegetable family. Crucifeous vegetables are all part of the cabbage family and are known to help lower ones' risk of developing cancer. Brussels sprouts are packed with fiber, lutein, vitamins A, C, and E, as well as antioxidants. And, they are becoming increasingly more popular in modern day cuisine. All the celebchefs seem to have a recipe for them, and two of our favorite neighborhood restaurants, The Fireplace and The Abbey have them listed as staple menu items. And I'm always sure to order them when I am dining at one of those fine establishments, too. They like to grow in cool weather, making them easy to find in grocery stores year round.
This recipe will make Brussels sprout lovers and haters alike rejoice. The key is to monitor them as they transform from a bright green to a softer green with caramelized edges. The natural sugars in the vegetable are naturally pulled out when slowly sauteed over low to medium heat with garlic and olive oil. The flavors intensify when the broth is added and the skillet is deglazed. This side has five ingredients- that's it. Just be sure not to cook them on too high of a heat, or the garlic will burn and ruin the dish. A light brown color is good- dark brown or black color is bad.
I have never tried to convince Mr. Pickles to eat Brussels sprouts. Years ago he had sworn up and down to me that he loathed them and would never eat them. So I let it be. But lately, every time I make this side, he is by the stove top with a fork in hand, eating out of the skillet or stealing them off of my dinner plate!
Sauteed Brussels Sprouts and Garlic
10 oz. of fresh Brussels Sprouts, stems removed and sprouts cut into quarters
2 cloves of garlic, crushed through garlic press
1 tbsp. extra virgin olive oil
1 c. chicken or vegetable broth
fresh ground pepper
Remove stems and slice into quarters. |
Press two cloves of garlic through a garlic press and add to skillet with sprouts and olive oil over medium heat. |
When the leaves start to get golden brown on the edges, they are ready to be deglazed. |
Add cup of broth. Use a wooden spoon to loosen up dark bits on skillet. Cook until all broth has evaporated from pan. |
Sprinkle with pepper and serve. |
Sunday, January 15, 2012
Bonus Post: What to put on your wedding registry
This past Wednesday I met up with my newly engaged friend, Jackie. I am so excited for her, she met a great guy and will be married in the Finger Lakes this upcoming summer. Jackie and I have known each other for ten years, since we both started in the same field. We traveled together for work quite a bit those first few years and we'd always stay at the same hotels and would go out to dinner and lunch together. Because of business travel, a beautiful friendship developed.
Jackie knows that I worked in the China and Gift department at a local jewelry store when I first moved to Boston ten years ago. It was a great part time job, and I learned a lot about entertaining and formal dining. That combined with my love for the kitchen must have been what prompted Jackie to ask me to make a list of what she should register for. I said I would, and last night she sent me a gentle reminder to send her a list. So I just compiled one now.
My trusty etiquette book (Emily Post is my savior) tells me what to do in just about every type of social situation. It really is a good reference tool so you can steer clear of making a social faux pas. She also has some good ideas about weddings and registries, the wedding section of the book is pretty hefty. My personal opinion is that every home should have an etiquette book to help the family members reference what typical gifts are given for certain events, how events in certain religions take place, what to do in an embarrassing situation, etc.
Anyhow, here is my list in completely random order:
Electrics:
-coffee maker (12 cup or Keurig, depending on your need. I don't drink coffee every day so the 12 cup is my preference for when guests come.)
-If you don't do a Keurig, then grinding fresh coffee beans makes a huge differece. The best coffee grinder out there is one of the least expensive from Mr. Coffee.
-food processor (At least 7 cup capacity, with different discs for shredding and slicing.)
-stand mixer (I think a 5 quart is good, don't go too much higher than that. A 4.5 quart is fine, too. I have a Cuisinart but of course Kitchen Aid is the standard. Mine had more bells and whistles is all.)
-hand mixer (Good for whipping potatoes at the holidays, making whip cream, etc. I think both a stand and hand mixer are needed. Cuisinart is a bad name for a hand mixer, my mother's died after a few uses. Try Kitchen Aid or for a cheaper brand I love my Hamilton Beach).
-electric knife (For carving roasts and turkey at the holidays, this helps it to go so much quicker.)
-electric grill and griddle from Cuisinart. (I use mine all the time to cook bacon while draining grease, pancakes, French toast, paninis, burgers, etc). You may want to also register for the waffle plates to make waffles with this tool as well.
-toaster or toaster oven
-blender
Cooking essentials:
-mandoline
-meat thermometer
-wooden board (One side for kneading pastry, the other side with a well for slicing meats.)
-metal baking pans (Nordicware is a good name) 9x13 cookie sheets (2), bread loaf pan, 11x7 pan and 8x8 pan(if there isn't one in your glass set), 12 capacity muffin pan, and 8 or 9 inch cake pans (at least two for making layer cakes)
-cookie cooling racks
-bunt cake pan
-glass pie dish, 9 inch
-glass nesting bowls for mixing
-glass measuring cup for liquids
-metal nesting measuring cups and spoons for dry goods
-storage set for leftovers ( I like the snap lids with the glass bottoms.)
-roasting pan with cradle (for turkey and roasts at the holidays)
-pot and pan set (I don't like non-stick due to the cancerous materials found in them. I love my Calphalon Contemporary Stainless set. And of course, All-Clad is king but is very costly. Cuisinart stainless are decent. Do a 8-12 piece set.)
-tea kettle
-wok
-baster
-wooden spoons and spatulas
-pastry/dough hook for blending pie dough
-garlic press
-cheese grater (rotary for pasta)
-box grater
-whisk
-turkey lifters
-meat tenderizer
-frosting spreader
-masher
-grease separator (for making gravy)
-cast iron stock pot (4.5-6 quart capacity. My personal opinion is that no brand compares to the hand cast quality of Staub from France. But I know many people like Le Creuset. Don't buy a cheap brand, you run the risk of the enamel chipping. I'll blog about that soon. This is one item you want to be from a quality manufacturer).
-knife set (at least 7 different sizes. I personally prefer German steel. Make sure you put them in your hand to see which brand you prefer/feels better ergonomically to you. The metal should continue from blade tip through the base of the handles' center. They won't come loose this way and will last for life. I prefer Wusthof as a brand. You should have a paring knife, a utility or santoku knife, a bread knife, a cook's knife, and kitchen shears.)
-steak knives (4-6)
Serving pieces:
-cake knife and server for your wedding day
-chip and dip set
-crudite
-domed cake stand
-high ball glasses
-double old fashioned glasses
-wine decanter for breathing red wine before serving
-chip resistant wine glasses in both red and white (We love our Luigi Bormioli ones.)
-beer pilsner, steins, or mugs
-brandy snifters
-bar tool set
If you do formal China:
-five piece place settings (8-12 is typical)
-rimmed soup bowls (8-12 is typical)
-open vegetable bowls (1-2)
-platter
-butter dish
-gravy boat and stand
-salt and pepper
-sugar and creamer
**If your China set doesn't have all the serving pieces then you can register for crystal or metal ones to coordinate
-crystal stemware
-flat ware sets AND at least 2 serving spoons, a pierced spoon, and large meat fork for serving (must by 18/10 steel of good quality if you choose to do stainless ---steel instead of sterling silver. Waterford and Gorham make beautiful and durable pieces)
-linen or cotton napkins
-napkin rings
Linens:
-(at least two) good towels sets (Egyptian cotton is most absorbent)
-kitchen towels
-cotton blanket for bed
-sheet sets
-comforter and cover
Note: Check out this knife and coffee maker review I came across in today's Globe!
Thursday, January 12, 2012
Soup's On: Best Ever Chicken Soup
It will be three years ago this upcoming March that Mr. Pickles and I went on our first date. It was twelve years in the making. You see, Mr. Pickles and I went to college together and were good friends. Our lives went in separate directions post graduation and I didn't see him for eight years. I certainly thought about him over the years and was over the moon with happiness when he found me on facebook and we reconnected. I wanted to impress him during those first few months of our courtship, so I would invite him over to my condo for dinner after work a few nights a week. I would fuss over what to cook and hoped that my cooking would impress him. Of course, I always had a fresh vegetable or salad on the table. And Mr. Pickles always ate everything I served to him. Once we got serious after those first few months he dropped the bomb on me: he hated ALL vegetables except for corn and potatoes. I had to inform him that those two vegetables he liked actually fell in the starch category, which meant, in my eye, he hated all edible vegetation. He told me that he choked down the veggies I would serve him because he liked me so much and didn't want to disappoint me. I was devastated. Then I decided that I wouldn't accept the fact that he hated vegetables. I would have to get creative. I would sneak veggies into things (I do it all the time and he never catches me) or sometimes I downright beg him to try them before he passes judgement. So far I have had great success. He now eats asparagus, edamame, spaghetti squash, and he even asked if he could have some of my brussel sprouts last week. I almost fainted. And on Christmas Eve one of his gifts to me was trying broccoli at the dinner table! He calls me a "chef" all the time and I love when he does. I love how endearing he is when it comes trying vegetables. He knows my stance: you can't say that you don't like a particular food until you try it at least once. So far he has been willing to try most veggies I put in front of him.
This winter has been abnormally warm in New England. We had one freak snow storm at the end of October and haven't see more than a few rogue flakes in the air since. It feels strange to me. Thankfully we haven't had to shovel our cars out of snow banks on the streets of Boston yet. As much as I hate cold weather, it does help you to slow down a bit and hunker down near home. It forces you to nest which means cooking to me. And, it's soup season, after all.
Remember the roasted chicken I made last week? Well, I boned the chicken that night and sent the left over meat to the freezer in a storage container. I had plans for the leftover chicken and last night was a perfect night for chicken soup. I love soup but I am not big on plain old chicken soup. This version is anything but plain old chicken soup. You'll never go back to mundane chicken soup again. This recipe is simple, extremely healthy, and low in fat. The addition of fresh dill and parsley are a bonus. Not only does the soup look gorgeous in a bowl with the fresh green herbs incorporated with all of the soup's golden hues, they add a powerful flavor punch. The sweet potatoes and parsnips make such a difference, too. My Pickles once asked me what "the white things were" in the soup. I lied and told him that they were potatoes. So he ate them. They were really parsnips. I confessed a few days later when he was harassing me about something. He still eats the soup, parsnips and all. Maybe he doesn't hate vegetables as much as he claims to.
Use your food processor to slice your vegetables and save time. The best thing about this soup is the fact that you can add rice or a short cut of pasta in the soup with 7 minutes of cooking time remaining if you wanted to add a starch for a bit more substance. Saltines are also a great addition. Make a variation where you think you need to. Or leave it as is. Either way, you won't be disappointed with this recipe. And if you have leftovers, this soup freezes well for up to two weeks. Just make sure to let it get to room temp before you pop it in the freezer to prevent bacteria growth.
1 tbsp. canola oil
1/2 large onion, sliced
2 large carrots, sliced
2 celery stalks, sliced
2 parsnips, sliced
1 medium sweet potato, diced into 1/2-3/4 inch cubes
2 quarts chicken stock
2 cups chicken, cut into bite sized pieces
3 strands of fresh parsley, leaves finely chopped (no stems)
4 strands of fresh dill finely chopped (no stems)
salt and pepper to taste
rice or pasta (optional)
Heat canola oil in stock pot over medium heat. Saute the onions, carrots, celery, sweet potato, and parsnips for 3-4 minutes until lightly sauteed. Add the stock and chicken. Bring to a boil then immediately turn down to simmer. Cook for 30-35 minutes. Add herbs, salt, pepper, and rice/pasta (if desired). Cook for an additional 5-10 minutes.
P.S. Sorry there aren't many photos, Food Friends. My camera battery died. I will be sure to charge it up before I blog again!
This winter has been abnormally warm in New England. We had one freak snow storm at the end of October and haven't see more than a few rogue flakes in the air since. It feels strange to me. Thankfully we haven't had to shovel our cars out of snow banks on the streets of Boston yet. As much as I hate cold weather, it does help you to slow down a bit and hunker down near home. It forces you to nest which means cooking to me. And, it's soup season, after all.
Remember the roasted chicken I made last week? Well, I boned the chicken that night and sent the left over meat to the freezer in a storage container. I had plans for the leftover chicken and last night was a perfect night for chicken soup. I love soup but I am not big on plain old chicken soup. This version is anything but plain old chicken soup. You'll never go back to mundane chicken soup again. This recipe is simple, extremely healthy, and low in fat. The addition of fresh dill and parsley are a bonus. Not only does the soup look gorgeous in a bowl with the fresh green herbs incorporated with all of the soup's golden hues, they add a powerful flavor punch. The sweet potatoes and parsnips make such a difference, too. My Pickles once asked me what "the white things were" in the soup. I lied and told him that they were potatoes. So he ate them. They were really parsnips. I confessed a few days later when he was harassing me about something. He still eats the soup, parsnips and all. Maybe he doesn't hate vegetables as much as he claims to.
Use your food processor to slice your vegetables and save time. The best thing about this soup is the fact that you can add rice or a short cut of pasta in the soup with 7 minutes of cooking time remaining if you wanted to add a starch for a bit more substance. Saltines are also a great addition. Make a variation where you think you need to. Or leave it as is. Either way, you won't be disappointed with this recipe. And if you have leftovers, this soup freezes well for up to two weeks. Just make sure to let it get to room temp before you pop it in the freezer to prevent bacteria growth.
Best Ever
Chicken Soup
1/2 large onion, sliced
2 large carrots, sliced
2 celery stalks, sliced
2 parsnips, sliced
1 medium sweet potato, diced into 1/2-3/4 inch cubes
2 quarts chicken stock
2 cups chicken, cut into bite sized pieces
3 strands of fresh parsley, leaves finely chopped (no stems)
4 strands of fresh dill finely chopped (no stems)
salt and pepper to taste
rice or pasta (optional)
Heat canola oil in stock pot over medium heat. Saute the onions, carrots, celery, sweet potato, and parsnips for 3-4 minutes until lightly sauteed. Add the stock and chicken. Bring to a boil then immediately turn down to simmer. Cook for 30-35 minutes. Add herbs, salt, pepper, and rice/pasta (if desired). Cook for an additional 5-10 minutes.
P.S. Sorry there aren't many photos, Food Friends. My camera battery died. I will be sure to charge it up before I blog again!
Monday, January 9, 2012
Meatless Monday: Spaghetti Squash with shallots and cheese casserole
Food friends, we live in a 448 square foot condo. I have to occasionally remind myself of that. I purchased this place nearly five years ago when I was still single. I never imagined that I'd live here with anyone, but it was the best choice for us when Mr. Pickles and I decided to get serious. The economic downturn meant we had to sit tight for a few years until we could at least break even on this cute little place. You'll notice that most of my photo shots are tight right now. It sort of goes with the theme of our Boston condo- tight. Our goal is to sell or rent this place by summer. And Mr. Pickles promised me the kitchen of my dreams in our new home. He keeps his promises, too. I can't wait to be in a bigger space. All of my new kitchen items that I received at my wedding shower are in storage at my parents' house. It's such a bummer but I have no space for anything else in our kitchen. All in all this little condo has been pretty good to me over the past five years. Mr. Pickles did major renovations to improve the space. So as much as I am looking forward to a bigger kitchen, at the present time this one is just fine for me and my blog. And hey, good things come to those who wait, right?
A few days ago as I began to contemplate what to make for Meatless Monday, I realized that we had a spaghetti squash sitting in the fridge for a week now, waiting to be eaten. As I began to research recipes using this mild squash, I knew I would have to get pretty creative in order for my carnivore driven husband to eat it. Folks, let me tell you- I didn't just hit a home run, this dish was an out of the park grand slam! He had TWO helpings! He licked his plate clean practically! Whoo-hoo! He is the best husband ever.
I adore chevre (goat cheese) and I wanted to contrast this soft cheese with a nuttier, more piquant one. I chose manchego over the more commonly known pecorino romano and parmigiano reggiano. Manchego is a sheep's milk cheese like its cousin pecorino romano. Manchego is slightly less salty than pecorino romano and hails from Spain (pecorino romano hails from Italy). My cheese choices paired wonderfully with the lightly carmelized shallots and fresh sage. Let me know if your meat and vegetarian friends alike think this is a home run!
Spaghetti Squash
1- 3 pound spaghetti squash
2 large or 3 medium shallots, thinly sliced
2 tbsp. olive oil, more for basting squash
2 tablespoons of finely chopped fresh sage
1 tbsp. honey
1/2 tsp. fresh grated nutmeg
1/3 c. shredded manchego
3 oz. chevre
1/4 c. seasoned panko breadcrumbs
Preheat oven to 375 degrees fahrenheit.
Slice the spaghetti squash in half, scoop out the seeds. Brush each half lightly with olive oil, and sprinkle lightly with sea salt and freshly ground pepper. Baked in the oven at 375 degrees for 35-45 minutes, or until squash flesh is tender enough to shred.
While the squash is in the oven, pour 2 tbsp. olive oil into a large skillet. Heat over medium heat. Place shallots in oil, lightly saute until the are golden in color. Add in the sage and honey. Continue to saute for an additional minute. Remove the squash from the oven, and shred into "spaghetti" strands with a fork. Throw out the squash skins.
In a large bowl combine cooked squash flesh, manchego,and shallot mixture. Add grated nutmeg and combine with a wooden spoon. Spray a 8x8 glass pan or round casserole with cooking spray. Add half of the squash mixture in the pan. Dot with half of the chevre. Add the rest of the squash mixture, dot with the rest of the chevre. Sprinkle breadcrumbs on top. Spray the breadcrumbs generously with cooking spray.
Return to the oven under a broiler and cook for 3-5 minutes, or until breadcrumbs are golden in color.
Note: My husband, the vegetable hater, had two helpings. Did I say that already? But he did suggest that next time we should add figs to the dish. I agree- that would be a fabulous addition!
.
Friday, January 6, 2012
Family Dinner- white wine roasted chicken with vegetables
Whew! I can't believe it is already Friday! This week was a whirlwind at work. I had hoped to post this blog on Wednesday. This is one of the busiest times in my field and I didn't get home from work before 7:30 much this week. Until tonight, that is. We finally had a delicious family dinner this evening. I was home by 6 and had the time to assemble this dish and blog about it.
It was good for us to sit down and enjoy a nice home cooked dinner. I just love quiet weekends and we have one on tap for this weekend finally. We haven't had one since before the holidays so this weekend is going to be well enjoyed by us both. My husband even played a little Miles Davis for me without even asking! He knows me so well- jazz is king in my book, especially when I am enjoying dinner!
I think there's an assumption out there that roasting a whole chicken is hard and that you need to do a lot to pull it off. That isn't the case at all, I can assure you! The best thing about roasted chicken is the fact that you can make several dishes with the leftover chicken as well.
My husband loathes most vegetables. For some reason, he gobbles up the ones that are in this dish and any recipe that gets my husband to eat vegetables is a winner in my book. He especially likes the garlic chips that add so much flavor to the vegetable medley. A tip about cooking with wine: buy an inexpensive white wine. Choose a variety that you enjoy drinking. I usually run to the liquor store and buy a cheap bottle of Sauvignon Blanc to cook with. Don't buy cooking wine found on the grocery store shelf- it is filled with sodium and the flavor is off.
And once everyone has enjoyed this meal, bone the chicken and save the meat for soup night. Let the chicken come to room temperature before you put it into the fridge (putting hot food into a cold space causes bacteria to grow). Chicken will keep in the fridge for three days or in the freezer for up to two weeks. Stay tuned- I am going to tell you how to make the ultimate chicken soup with the leftover chicken next week!
Try this out on your loved ones, I am sure it will be a huge success and everyone will be cheering your name at the dinner table!
White Wine Roasted Chicken with Vegetables
1 3.5-4 lb. whole chicken, gizzards and neck removed from the cavity
2 cups of sliced onion
1 cup of sliced carrots
1 cup of sliced celery
4 garlic cloves, sliced
1 sprig of fresh rosemary
1/8 c. fresh chopped sage
a small amount of fresh dill, finely chopped
4 tbsp. extra virgin olive oil
1/2 c. white wine
3/4 c. low sodium chicken broth
salt and pepper
1. Slice the vegetables and garlic. It is a piece of cake with your food processor! |
2. Add all the sliced vegetables to a cast iron la cocotte or a 9x13 glass baking dish |
3. Place the chicken on top of the vegetables in your baking dish |
4. Rub olive oil generously onto the skin, then salt and pepper to taste |
5. Pour the wine and broth around the chicken and on top of the vegetables |
6. Add the fresh herbs |
7. Into the oven at 400 degrees fahrenheit for 45-60 minutes. Make sure a meat thermometer in the thickest part of the thigh reads at least 190 degrees fahrenheit before eating. |
8. Dinner is served! |
Sunday, January 1, 2012
Welcome to my blog!
I have been wanting to do something creative to improve my culinary knowledge and to allow myself to explore a subject that I am very passionate about. After reading The Happiness Project, I began to realize that everything I wanted to do with my life was always being put off until tomorrow. I was making excuses instead of progress in regards to things that really mattered to me. My creative side was suffering greatly because other things were getting in the way and the main definition of who I am was being defined primarily by my profession. Having realized that I am more than that, I decided that 2012 was the year I would begin to blog about a subject I love- eating well. Friends and family helped along the way- my last birthday I was given a gourmet food store gift card from my sister-in-law to encourage me explore and to publish my findings in a blog (don't worry, Laura, that post is coming shortly!). And my best friend Kate has been chirping in my ear for some time now about writing a blog. So here I am. Now let's talk about food:
It is important to be aware of what goes into your body. After all, your body is your temple and it is up to you to take responsibility for what goes into it. My food philosophy has evolved over the years and I am happy to say that I have adopted an all natural food lifestyle. I strongly encourage you to do the same. It may sounds expensive to purchase organic, humane, and hormone free food. I can assure you, it isn't much more costly than purchasing food filled with preservatives and it is so much better for you, your family, and the health of you all. In the long run it will be a cost effective lifestyle change. You will be healthier, too. That's not to say that I don't allow myself to occasionally eat junk food, I still do from time to time. But most days I am eating antibiotic and hormone free food that is free range and/or organic whenever possible. The better the food is that you put into your body, the better you will feel and the more productive you will become.
Tips on how to move towards an all natural diet:
-Purchase locally grown produce and products when possible, especially those produced without the use of pesticides and other preservatives. This act not only helps to strengthen your local community and economy, it keeps your neighbors and small business owners at home working, but the food is also fresher, making vitamin and mineral content higher than those foods found at the large corporate stores.
-Don't buy canned food. Although there are some exceptions such as tomatoes, broths and stocks, and beans, cans distort flavors, uses higher amounts of artificial preservatives, and have a much higher sodium content than dried, fresh, or frozen foods. Canned food is also linked to Bisphenol (BPA) which is a toxin that current day Americans are consuming too much of without even realizing it.
-Look for eggs, dairy products, and meats that are organic, free range, or at the very least antibiotic and hormone free. Studies have shown that we are becoming resistant to certain antibiotics because we are exposed to them through food consumption. In addition, hormones are used to fatten up livestock to produce more product in a shorter amount of time. Consuming foods rich in hormones is causing Americans to beef up as well- definitely not a good thing. Still not convinced? Then rent the movie Food, Inc. That will change your mind. And then check out allatonce.org.
-Festive Foods
-Food Field Trips!
-From the old country (family hand-me-downs)
-Happy Hour- it's cocktail time!
-Is there an app for that?
-Kitchen Gadgets
-Meatless Mondays
-Sinful Sides
-Soup's on! (and in warmer months) Fresh from the garden salads
-Sweet Endings
-Wednesday is Winesday!
And furthermore, if you have any questions that you'd like me to answer, shoot me an email at mrspickles@mrspicklespantry.com.
It is important to be aware of what goes into your body. After all, your body is your temple and it is up to you to take responsibility for what goes into it. My food philosophy has evolved over the years and I am happy to say that I have adopted an all natural food lifestyle. I strongly encourage you to do the same. It may sounds expensive to purchase organic, humane, and hormone free food. I can assure you, it isn't much more costly than purchasing food filled with preservatives and it is so much better for you, your family, and the health of you all. In the long run it will be a cost effective lifestyle change. You will be healthier, too. That's not to say that I don't allow myself to occasionally eat junk food, I still do from time to time. But most days I am eating antibiotic and hormone free food that is free range and/or organic whenever possible. The better the food is that you put into your body, the better you will feel and the more productive you will become.
Tips on how to move towards an all natural diet:
-Purchase locally grown produce and products when possible, especially those produced without the use of pesticides and other preservatives. This act not only helps to strengthen your local community and economy, it keeps your neighbors and small business owners at home working, but the food is also fresher, making vitamin and mineral content higher than those foods found at the large corporate stores.
-Don't buy canned food. Although there are some exceptions such as tomatoes, broths and stocks, and beans, cans distort flavors, uses higher amounts of artificial preservatives, and have a much higher sodium content than dried, fresh, or frozen foods. Canned food is also linked to Bisphenol (BPA) which is a toxin that current day Americans are consuming too much of without even realizing it.
-Look for eggs, dairy products, and meats that are organic, free range, or at the very least antibiotic and hormone free. Studies have shown that we are becoming resistant to certain antibiotics because we are exposed to them through food consumption. In addition, hormones are used to fatten up livestock to produce more product in a shorter amount of time. Consuming foods rich in hormones is causing Americans to beef up as well- definitely not a good thing. Still not convinced? Then rent the movie Food, Inc. That will change your mind. And then check out allatonce.org.
Next, you will need some basic kitchen tools to help you create delicious recipes in a small amount of time. I will blog about tools I find helpful from time to time. But to get started you will need a couple of good knives, pots and pans of various sizes (try to stay away from non-stick pans which are also linked to elevated risk of developing certain types of cancer), baking pans, and a food processor. The last item will be your kitchen saving grace. Trust me, this product is worth its weight and gold and then some and you will use it all the time. If you don't have one, I recommend purchasing one immediately. Purchase a processor with at least a seven cup capacity. Cuisinart makes fabulous food processors. For a more economical line, I trust Hamilton Beach products. Both of these companies make products that last and that have excellent warranties.
I hope you find the postings on this page helpful. This blog will have posts on the following themes on a regularly rotating basis:
-Family Dinner-Festive Foods
-Food Field Trips!
-From the old country (family hand-me-downs)
-Happy Hour- it's cocktail time!
-Is there an app for that?
-Kitchen Gadgets
-Meatless Mondays
-Sinful Sides
-Soup's on! (and in warmer months) Fresh from the garden salads
-Sweet Endings
-Wednesday is Winesday!
And furthermore, if you have any questions that you'd like me to answer, shoot me an email at mrspickles@mrspicklespantry.com.
Subscribe to:
Posts (Atom)